You have orders to ship. The parts are on the shelves. The real question is how consistently your team gets the right parts from shelf to box.
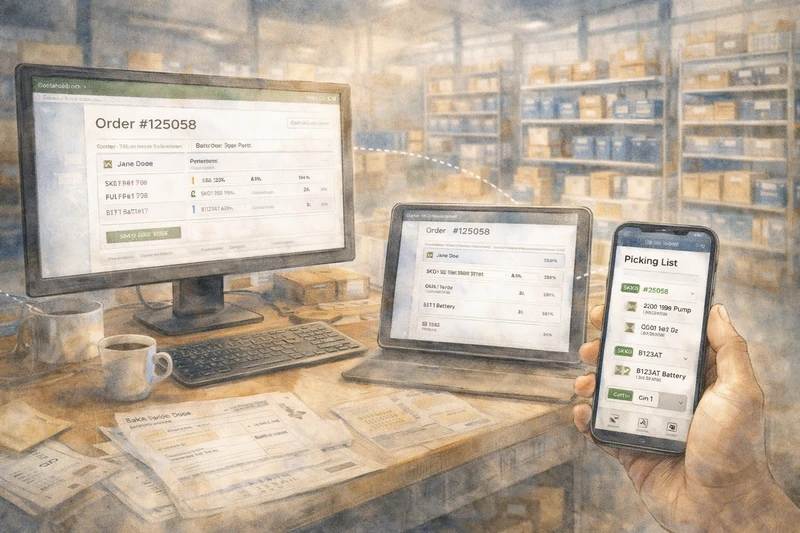
Your team is doing repetitive work under real-world pressure. When people are pulling parts all day, honest mistakes do not usually come from carelessness — they come from speed, fatigue, and repetition. PMP’s picking workflow is built around a scanner in your hand, not a keyboard on a desk, so the system helps verify each pick before it leaves the shelf. Here is how a session works from start to finish (screenshots from iPhone).
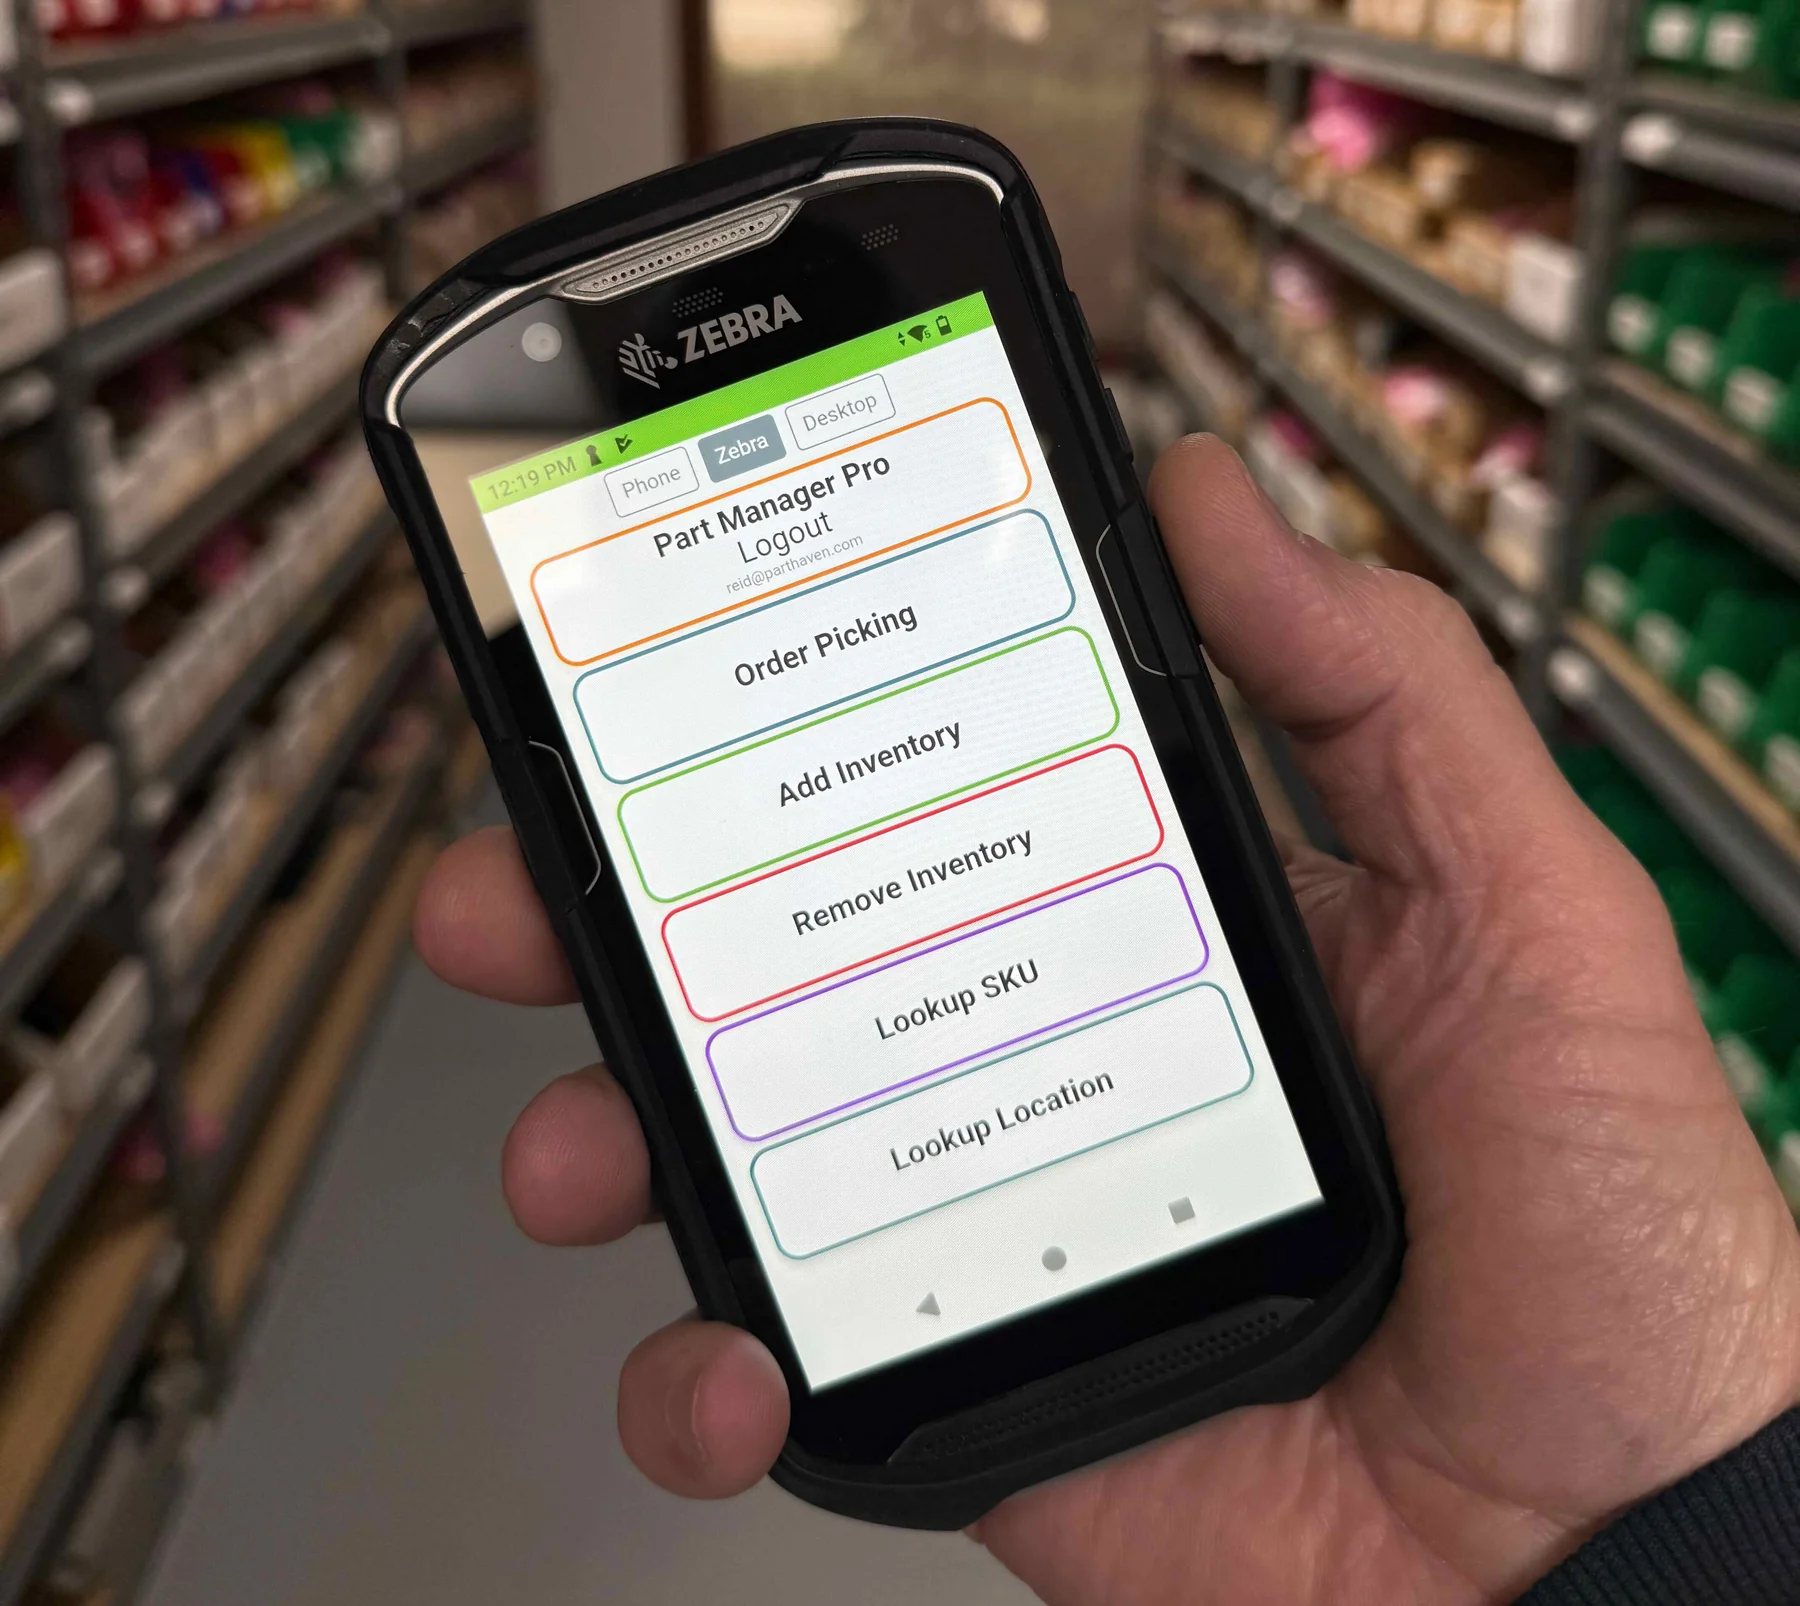
Starting a session
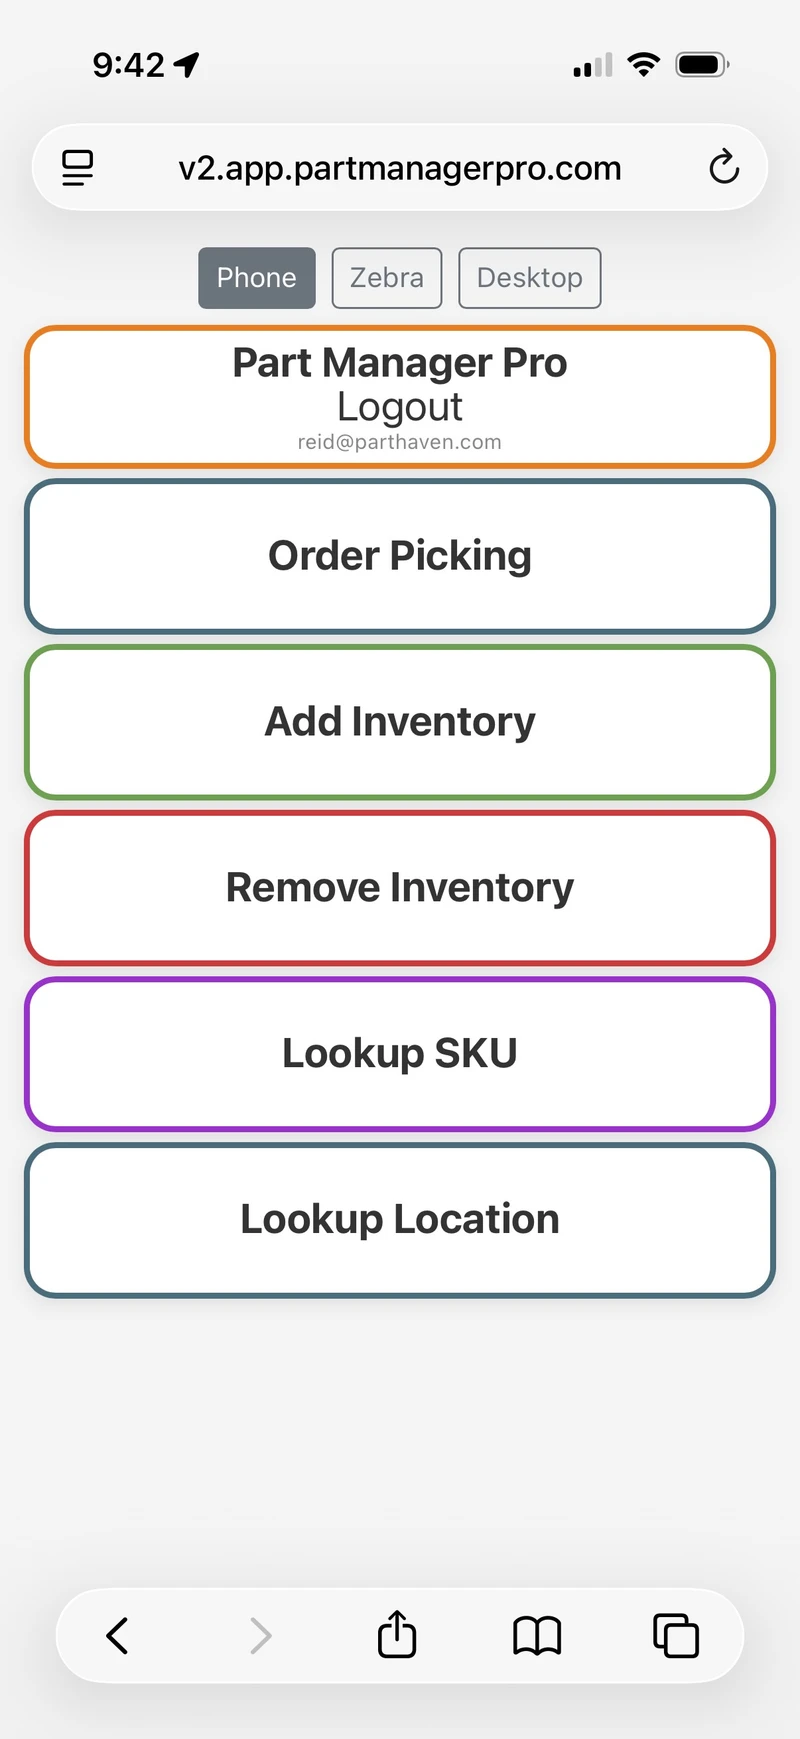
Open PMP on your phone or handheld device and tap into picking. If you have a session in progress, PMP picks up right where you left off — no lost work, no starting over.
If there is no active session, PMP guides you through starting a new one. This is where you organize your picking cart with the orders you are about to pick — one order, one bin. Any packing slip can go into any bin, and if you have larger items you can dedicate whole shelves to a single order. The system allows for all types of workflows.
Adding orders to your cart
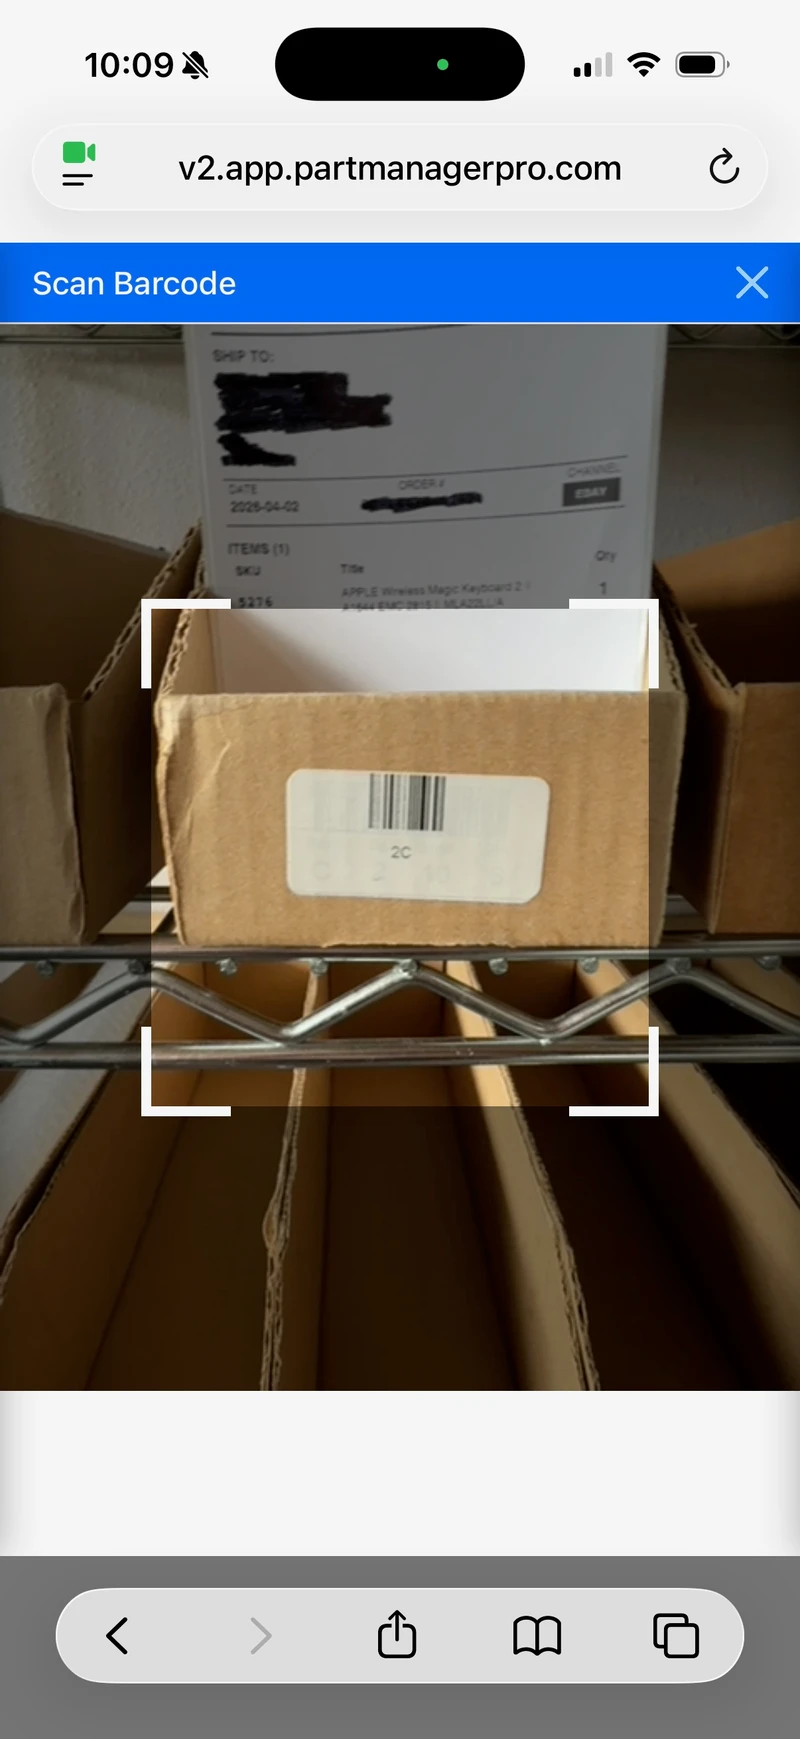
Setting up your pick cart uses a two-scan flow. First, scan the packing slip — each order has a QR code. PMP shows you the order number, line item count, and enough context to confirm you have the right slip. Then scan your cart bin or shelf. PMP links that bin to that order, so later when you are pulling parts, the system tells you which bin gets which item.
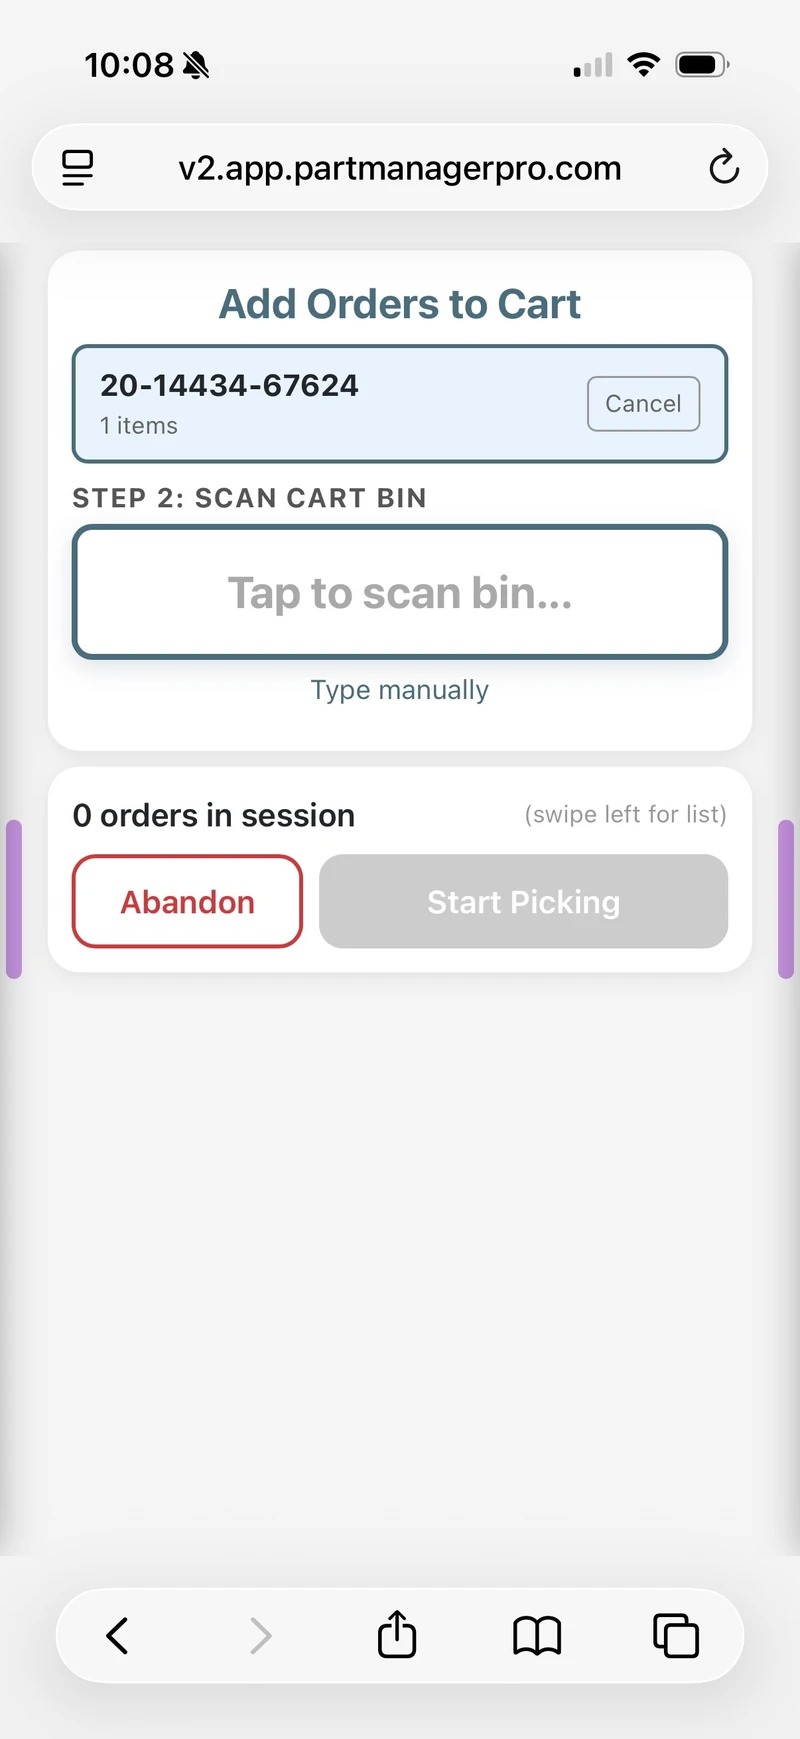
Repeat for every order you want to pick in this run. You can build a multi-order session without treating each order as a separate walk.
One rule: each bin holds exactly one order. If you try to assign a bin that is already in use, PMP tells you which order is already there and asks you to choose an empty bin. It is an easy mistake to make when you are loading a full cart — the system catches it so your team does not have to.
Reviewing before you walk
Once your cart is loaded, you move to the review screen — your chance to look over the scanned orders and make any changes before you start.
The review shows your complete pick queue: every SKU you need to pull, which locations they are in, and what quantities are required. If something looks wrong, you can go back and add or remove orders.
When you are satisfied, tap Start Picking. PMP moves the session into active picking and locks the orders to your session, so the same order cannot be picked by someone else at the same time. From here, PMP guides you through the picking process one step at a time.
Picking: scan-driven verification
This is where the scanner-first design matters most. PMP uses a three-scan verification flow for each pick — location, then SKU, then bin. Each scan is checked against the open pick the instant it lands.
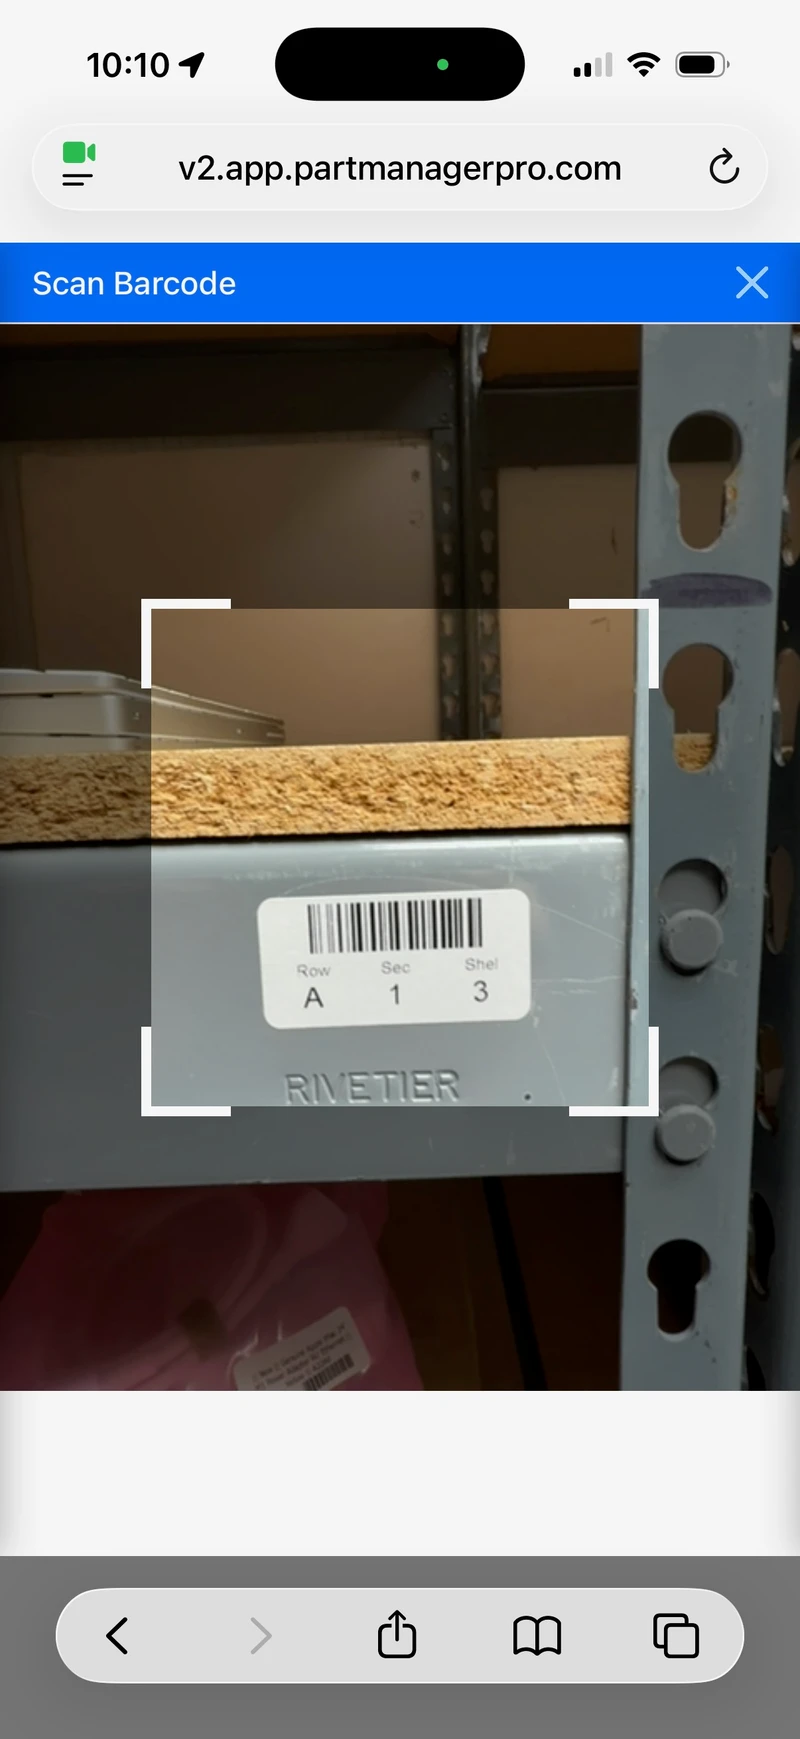
Scan the warehouse location
PMP tells you which location to walk to. Scan the location barcode when you arrive. If you are at the wrong spot, PMP flags it immediately — before you pull anything.
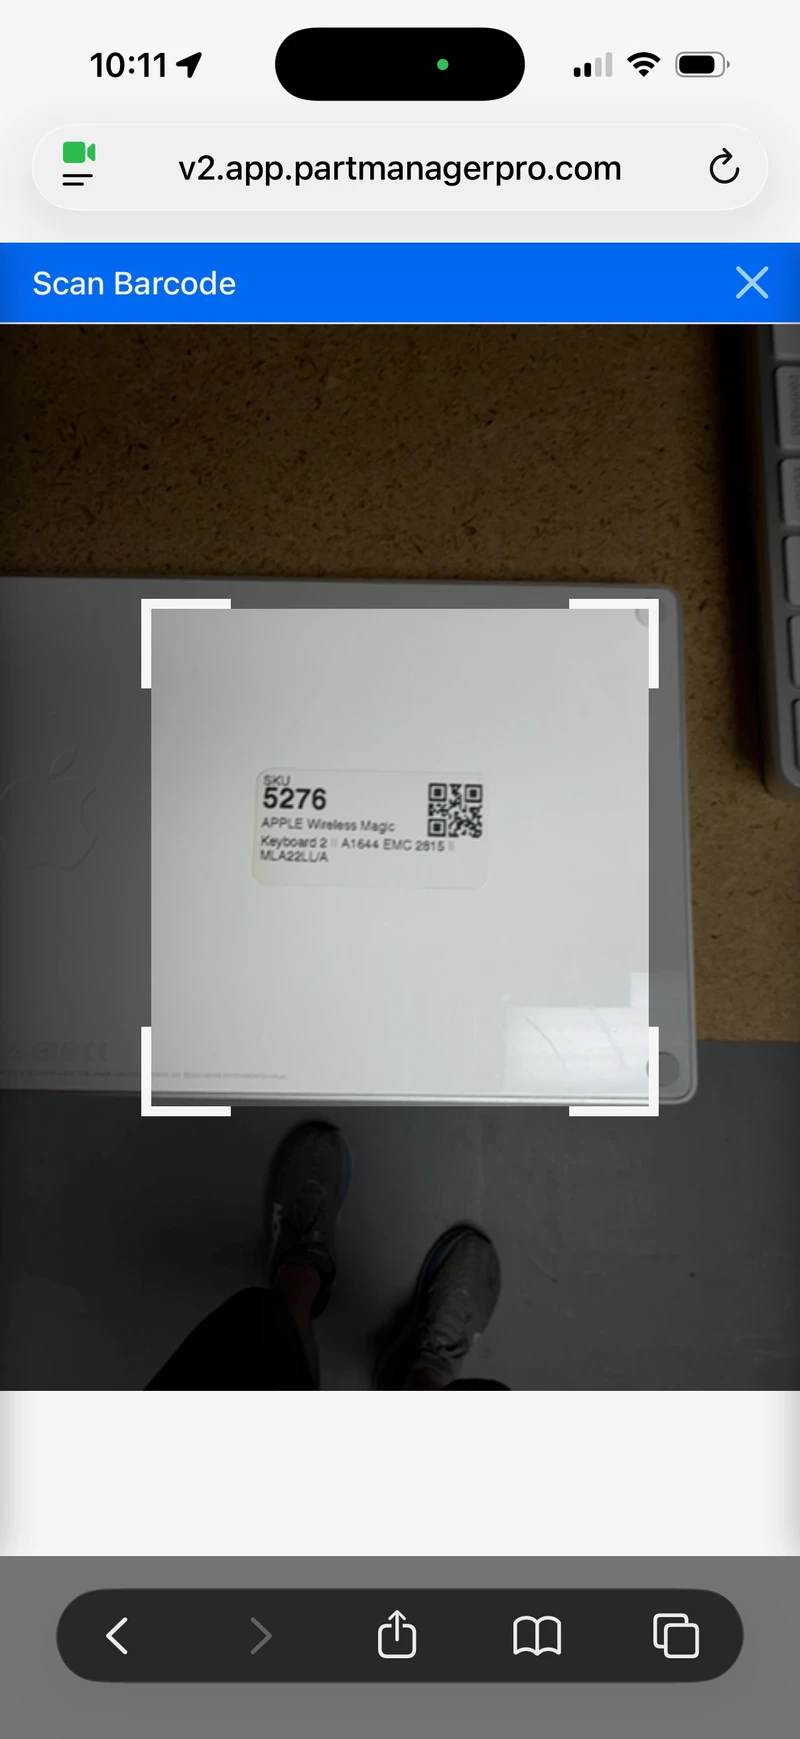
Scan the product SKU
Scan the part’s barcode. PMP confirms it matches what the order expects. If the order needs three of the same part, you scan the SKU three times — PMP tracks each scan and shows your progress.
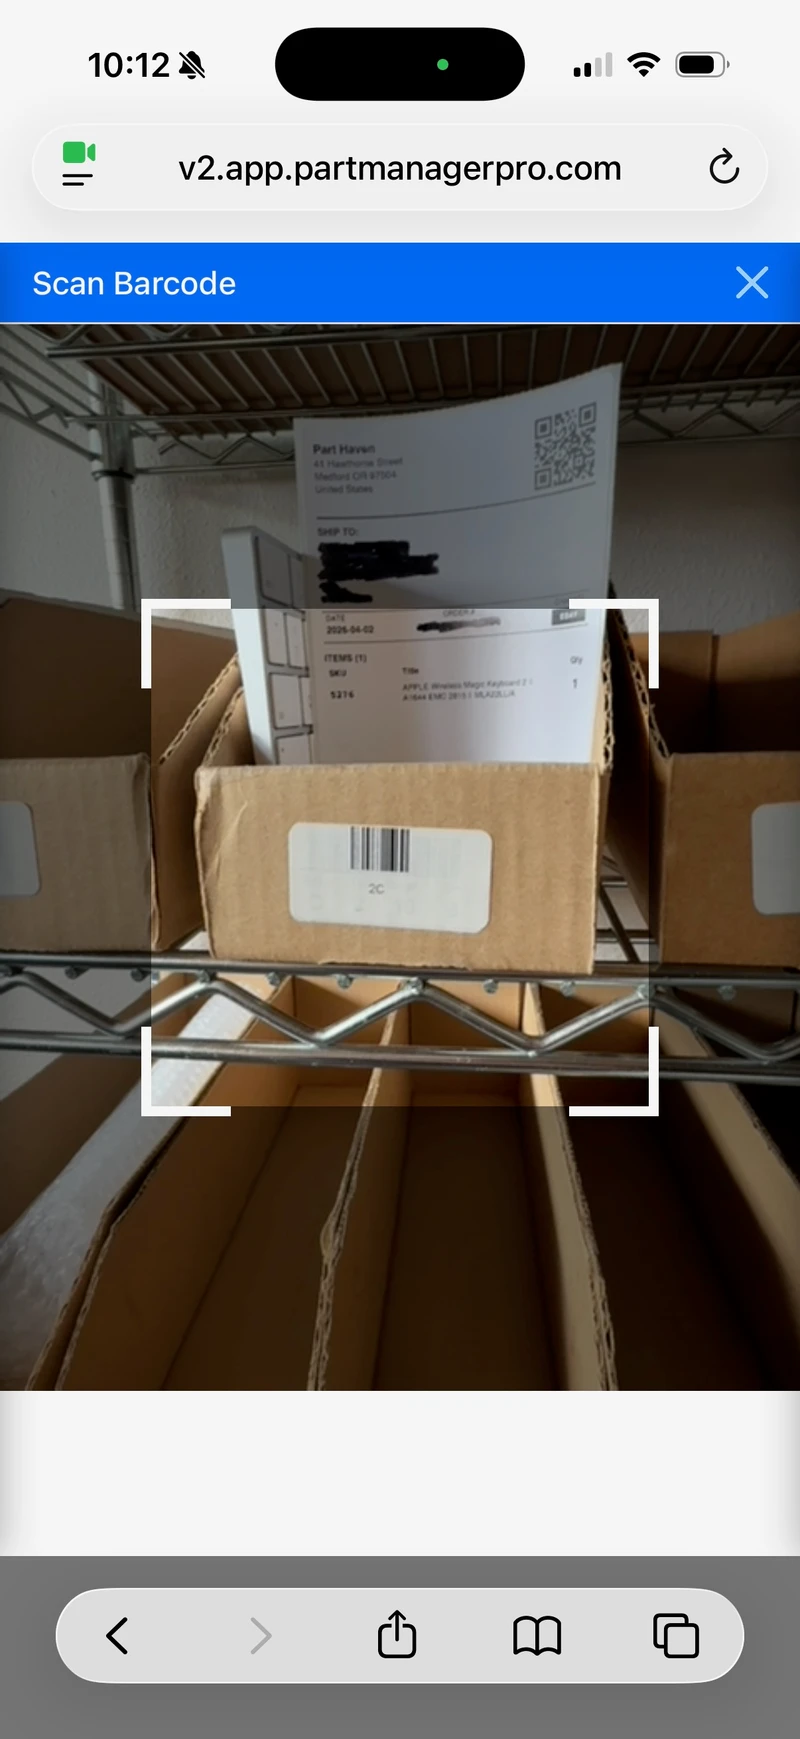
Scan the cart bin
PMP guides you to the correct bin for the picked item. Scan the bin — PMP confirms it is the right bin for the right order, and the part is picked. If the wrong bin is scanned, PMP warns you before anything lands in the wrong place.
The scanner does not get tired. It checks every location, every SKU, and every bin the same way at pick fifty as it did at pick one.
People are not machines. By the fiftieth pick of the day, muscle memory takes over and the eyes start skipping ahead. Three scans are all it takes to back up a picker who is doing their best across a long shift.
Want to watch the picking flow end to end? Schedule a demo and we’ll run a scanner-first pass with your own data.
Directed walking: location by location
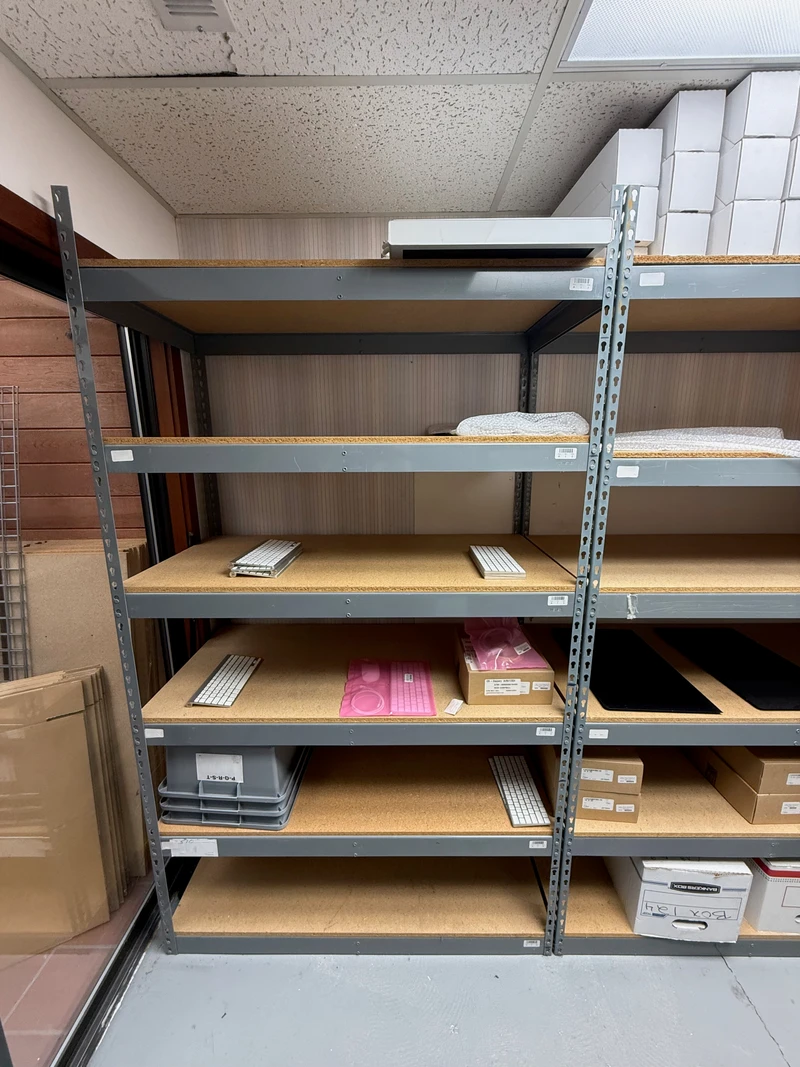
PMP organizes picks by location and routes you through the warehouse in a logical order. You walk each aisle once instead of doubling back because two orders need parts from the same shelf.
At each location, you see every item that needs to come off that shelf — across all the orders in your session. Pull everything for that spot, confirm each pick, place the item in the correct bin guided by the handheld, and move to the next location. The progress bar at the top shows how far through the session you are.
When something goes wrong
A part might be missing from the shelf, damaged, or in the wrong location. PMP handles this without derailing the rest of your session.
- Skip an item. Tap skip, give a quick reason, and PMP moves you to the next pick. Skipped items show up in the desktop pick review queue where the issue can be handled — capture it, document it, and move on without leaving the pick queue. No production time lost to documentation; fix the issue as time allows.
- Walk away and come back. Close PMP and return later. Your session is saved exactly where you left it, and you resume from the next unfinished pick.
- Abandon the session. If the whole session needs to be scrapped, tap Abandon. PMP releases the orders so they are available for the next picker. Reservations stay in place — the inventory is still held for those orders.
Fulfillment groups: multiple orders, same customer, one box
When multiple orders ship to the same address, PMP groups them into a fulfillment group. This is automatic — you do not set it up.
What it means for picking: packing slips are identified as belonging together, so when you set up your cart the orders are easy to spot as a group, and when you pack them you can see they belong together. This keeps orders for the same customer together through the picking process so shipments to the same address do not get split across sessions.
Phone mode and handheld devices
PMP lets you switch the interface to match your current device.
- On a phone, the layout is optimized for touch — larger buttons, camera-based scanning, and a fullscreen scanner view. Your phone camera reads QR codes and barcodes directly, so you do not need dedicated hardware to get started.
- On a dedicated handheld like a Zebra TC52 or TC57, PMP uses the built-in hardware scanner. The layout adjusts for the handheld screen, and scan inputs are tuned for the physical trigger button. One DataWedge setting makes every scan auto-submit the form — walk through that setup here.
- In desktop mode, your phone or handheld switches to the full site interface — useful when you need information beyond the standard warehouse workflow without walking back to a computer.
You can switch between phone and handheld mode without logging out or reconfiguring.
What picking records in the background
Every confirmed pick updates the ledger — PMP’s permanent inventory record. The system records the inventory movement and updates the snapshot so on-hand counts reflect what is actually on the shelf in real time.
Your team sees updated quantities immediately. If someone checks stock while you are mid-session, they see current counts — not what was there when you started.
Each pick session is also recorded as a complete event: who picked, when, how many items, which orders. That data helps you spot patterns — which aisles slow pickers down, which SKUs get skipped most often, where counts are consistently off.
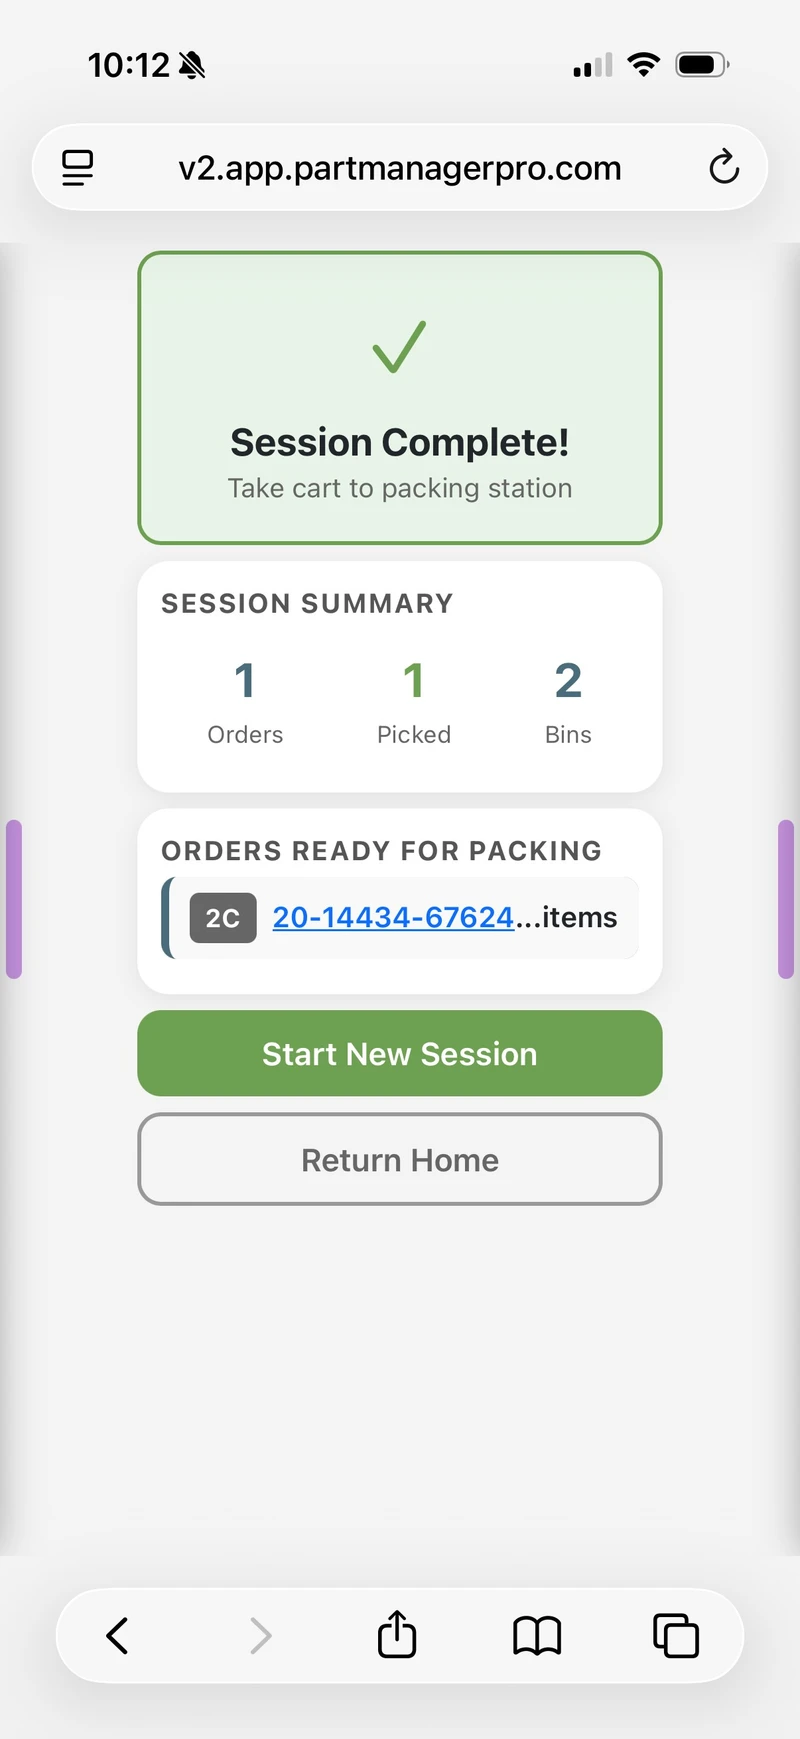
When every order in your session is picked (or accounted for via skips), PMP marks the session complete. You see a summary — how many orders, how many items picked — and then it is on to packing and fulfillment: verify picks, print shipping labels, seal boxes, mark shipped. The packing step is cleaner because the pick session was already verified as it happened.
- Picking accuracy lives in the verification, not the effort — scan-driven checks back up a tired picker on every pick.
- Three scans per pick: location, SKU, bin. Each is checked the instant it lands.
- One bin, one order — the system blocks a double-assigned bin before it becomes a mis-pick.
- Sessions are recoverable: walk away, come back, resume at the next unfinished pick.
- Start with a phone and one shelf; add handhelds and locations as you grow.
Start with what you have
You do not need a complete warehouse setup to get started. You can start organizing your operation with a phone and a printer. Begin with one shelf, and over time add more. You can mix PMP with your current organization while you set up. As your operation grows, add handheld scanners, print more location barcodes, and keep adding locations — PMP adapts to your pace.
Your pickers are already doing the hard part — walking the floor, pulling parts, getting orders out the door. Scan-driven verification just makes sure the system has their back on every pick, every time.
→ See how the full system fits together: Product Overview → How those inventory records work: Ledger-based inventory in Part Manager Pro → See what hardware works with PMP: Hardware Guide → Have a question about setting up picking for your team? Let’s talk
See PMP in your operation.
The fastest way to know if PMP fits your shop is to see the workflow with your own data — no slides, no scripted demo.